
Detailed Explanation of Fundamental Nodes in ComfyUI
Let’s explore the fundamental nodes in ComfyUI, focusing on their roles, inputs, outputs, and key parameters. These nodes are essential for most workflows, particularly text-to-image generation with models like Stable Diffusion. I’ll break down each node, how they connect, and the options you can adjust to customize your results.
If you are not yet familiar with the basic concepts of ComfyUI, please check this Getting into ComfyUI: A Beginner’s Guide.
1. Load Checkpoint
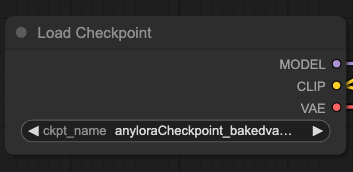
- Purpose: Loads a pre-trained generative AI model (e.g., Stable Diffusion, Flux) into your workflow. This node is the starting point, providing the “brain” for interpreting prompts and generating content.
- Inputs: None (source node).
- Outputs:
- MODEL: The loaded AI model, used by downstream nodes like KSampler.
- CLIP: The text-encoding component, used to process prompts.
- VAE: The Variational Autoencoder, used to convert latent representations into images.
- Parameters:
- Checkpoint File: Path to the model file (e.g.,
.safetensorsor.ckpt), selected from themodels/checkpointsdirectory.
- Checkpoint File: Path to the model file (e.g.,
- Example: Loading “sd-v1-5.safetensors” provides Stable Diffusion v1.5.
- Notes: The checkpoint determines the output’s quality and style. Different models suit different tasks (e.g., realism vs. anime).
2. CLIP Text Encode (Prompt)
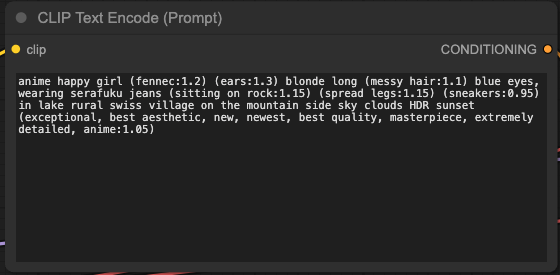
- Purpose: Converts a text prompt into a numerical embedding that the model understands, using the CLIP component from the checkpoint.
- Inputs:
- CLIP: From
Load Checkpoint’s CLIP output. - Text: A string you enter (e.g., “a serene forest at sunrise”).
- CLIP: From
- Outputs:
- CONDITIONING: Encoded prompt, fed into KSampler to guide generation.
- Parameters:
- Text: Positive prompt (what you want) or negative prompt (what to avoid, e.g., “blurry, low quality”).
- Details: Typically, you use two nodes: one for the positive prompt and one for the negative, refining the output by steering away from unwanted artifacts.
- Example: Positive: “a futuristic cityscape”; Negative: “distorted, dark, messy”.
3. Empty Latent Image
- Purpose: Creates an empty latent space (a compressed image representation) to define the output’s size and batch before generation.
- Inputs: None (source node).
- Outputs:
- LATENT: An empty latent tensor, filled by KSampler with generated content.
- Parameters:
- Width: Horizontal resolution (e.g., 512 pixels).
- Height: Vertical resolution (e.g., 512 pixels).
- Batch Size: Number of images to generate (e.g., 1 for a single image).
- Details: Latent space is smaller than the final image (e.g., 64x64 for 512x512 output) for efficiency. The VAE decodes it later.
- Example: Width=512, Height=768 for a portrait-style image.
4. KSampler
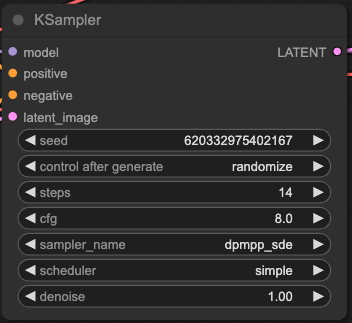
- Purpose: The core node that generates content by refining random noise into a coherent image (or other output) based on the model and prompt.
- Inputs:
- MODEL: From
Load Checkpoint. - POSITIVE: Conditioning from the positive
CLIP Text Encode. - NEGATIVE: Conditioning from the negative
CLIP Text Encode. - LATENT: Empty latent from
Empty Latent Image.
- MODEL: From
- Outputs:
- LATENT: Generated latent representation of the image.
- Parameters:
- Seed: Random seed for reproducibility (e.g., 42). Use “randomize” for variety.
- Steps: Sampling steps (e.g., 20–50). More steps = better quality, slower execution.
- CFG Scale: Classifier-Free Guidance scale (e.g., 7.5). Controls prompt adherence (higher = stricter).
- Sampler: Sampling algorithm (e.g., Euler, DPM++ 2M Karras). Affects speed and quality.
- Scheduler: Noise schedule (e.g., “normal,” “karras”). Influences noise reduction.
- Denoise: Generation strength (1.0 = full generation; lower for img2img).
- Details: Balances creativity and control. Low CFG (e.g., 3) yields abstract results; high CFG (e.g., 12) adheres closely to the prompt.
- Example: Steps=30, CFG=7.5, Sampler=Euler a, Seed=12345.
5. VAE Decode
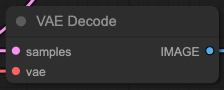
- Purpose: Converts the latent representation from KSampler into a full-resolution, viewable image using the checkpoint’s VAE.
- Inputs:
- SAMPLES: Latent output from
KSampler. - VAE: From
Load Checkpoint.
- SAMPLES: Latent output from
- Outputs:
- IMAGE: Tensor representing the final image.
- Parameters: None (simple conversion).
- Details: “Uncompresses” the latent (e.g., 64x64) to the target resolution (e.g., 512x512). Without this, you’d see noise.
- Example: Takes a latent from KSampler and outputs a PNG-like tensor.
6. Save Image
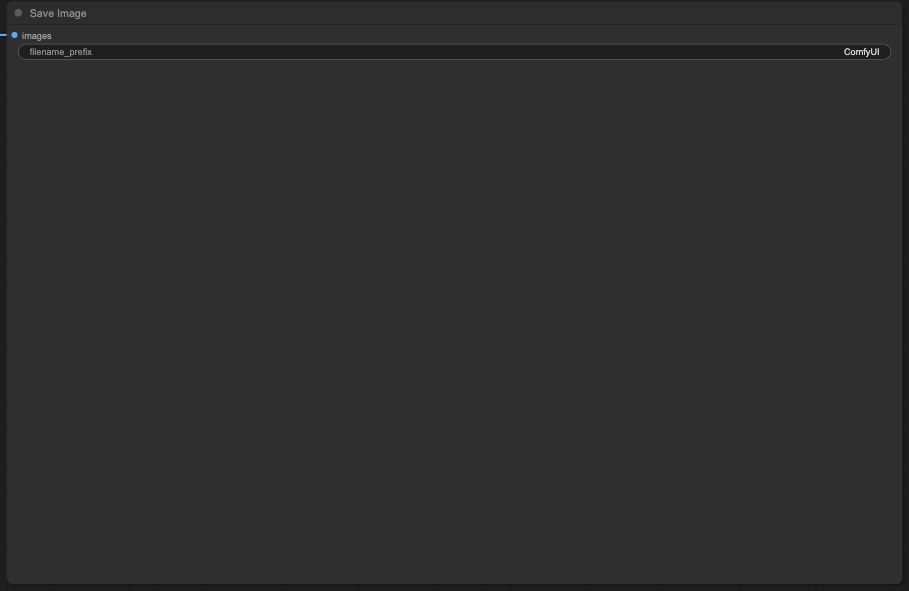
- Purpose: Exports the generated image to your filesystem.
- Inputs:
- IMAGES: From
VAE Decode.
- IMAGES: From
- Outputs: None (writes to disk).
- Parameters:
- Filename Prefix: Custom name (e.g., “output_”). ComfyUI appends a number (e.g., “output_00001.png”).
- Details: Saves to the
outputfolder as PNG files, viewable in any image viewer. - Example: Filename Prefix=“my_art” saves as “my_art_00001.png”.
How They Connect: A Basic Workflow
Here’s how these nodes form a simple text-to-image pipeline:
- Load Checkpoint → Outputs MODEL, CLIP, VAE.
- CLIP Text Encode (Positive) → Takes CLIP, outputs POSITIVE CONDITIONING.
- CLIP Text Encode (Negative) → Takes CLIP, outputs NEGATIVE CONDITIONING.
- Empty Latent Image → Outputs LATENT.
- KSampler → Takes MODEL, POSITIVE, NEGATIVE, LATENT; outputs generated LATENT.
- VAE Decode → Takes LATENT and VAE; outputs IMAGE.
- Save Image → Takes IMAGE and saves it to disk.
Click “Queue Prompt” to execute this chain, producing an image based on your prompt and settings.
Key Concepts in Depth
- Inputs and Outputs: Outputs are typed (e.g., MODEL, LATENT, IMAGE), and only compatible types connect. ComfyUI uses color-coded wires (e.g., blue for CONDITIONING, purple for LATENT).
- Parameters: Adjustable settings (sliders, dropdowns, text fields) in each node. Tweaking them (e.g., KSampler steps) fine-tunes results.
- Latent Space: Compressed, abstract image representation. Diffusion models work here for efficiency, with the VAE bridging to pixel space.
- Conditioning: Encoded prompt guides KSampler’s denoising. Positive pulls toward the description; negative pushes away from unwanted traits.
Practical Tips
- Debugging: If the image is off, adjust KSampler’s CFG or steps. Too low = incoherent; too high = overcooked.
- Speed vs. Quality: Fewer steps (e.g., 20) with Euler is fast but rough. More steps (e.g., 50) with DPM++ 2M Karras is polished but slower.
- Reusability: Save workflows as JSON files to tweak or share later.
These nodes are the foundation of ComfyUI’s power. Master them, and you can explore advanced nodes (e.g., for upscaling or animation) to expand your creations.